MoreGallery MoreGallery 1.x Getting Started
So you’ve installed MoreGallery and want to know what to do next? You’ve come to the right place!
In this getting started document we’ll walk you through the basic set up for MoreGallery. Setting up your first gallery should ony take a minute or two.
Table of Contents
Prerequisite: Installing MoreGallery
If you haven’t yet, the first step is to install the MoreGallery. You’ll need a modmore.com account and follow the instructions found in the Purchases section of the site.
On a local development domain, you may use a free development license. Otherwise you’ll need to buy a license first as well.
Step 1: Create a Gallery Resource
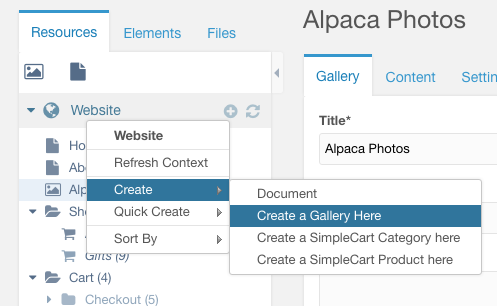
The first thing to do is to create a new Gallery Resource. This can be done by right clicking an existing resource, or the web context, and choosing Create > Create a Gallery Here.
Fill out the standard resource information and save the resource to create it.
Alternatively, you can change an existing resource to a gallery with a quick change.
Scroll down a little bit until you get to the Gallery section.
Step 2: Upload some images!
On the resource click the Upload button to select images from your computer, use the Import button to select an existing image on the server, or use Add Video and paste in a link to Vimeo or YouTube to embed that.
Once you’ve successfully added some images, move on to step 3.
Step 3: Display images on the site
To display images, you’ll use the mgGetImages snippet. It’s a flexible snippet that provides access to all information MoreGallery keeps about an image, including IPTC and Exif data (photographers love those!), Custom Fields and of course the basic file names and paths.
While you’ll probably want to place it in a template, go ahead and add the following to the Gallery content.
[[!mgGetImages]]
In this (lack of) configuration, images will be shown as a simple list of thumbnails. You may need to install pThumb (and make some other thumbnail tweaks for good measure) if images don’t show up on the first try.
Step 4: Onwards!
That was it!
Now that you have a basic set up running, you can customise the front-end markup with various properties on the mgGetImages snippet, use the permissions to lock down features in the manager, set up cropping to allow editors to select areas of images to use or investigate and implement the video support.