Commerce Commerce 1.x Product Catalog Products TV
Introduced in v0.8, the Commerce Products Template Variable is the recommended approach to manage products for most webshops. It allows you to connect multiple products to a single resource (and a product to multiple resources), and to output those with the commerce.get_products snippet.
For larger shops, it’s recommended to use Collections, and optionally Tagger, to build up the catalog.
Table of Contents
A first look at the Products TV
The Products template variable is available with the Commerce install. When set up and given a couple of product options, it might look like this:
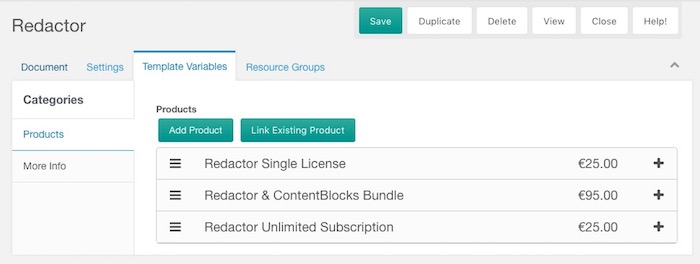
The Add Product button allows you to create a new product, directly from the resource, which will also be added to the resource when saved. The Link Existing Product lets you search through the existing products stored in Commerce, to add it to the resource.
Products are sortable with drag & drop, so you can easily reorder how the products are shown.
The products function as an accordion, so you can click on the bar to expand it to see more product information and product actions.
The left side of the product content is always the same, while the right side is determined by the product type. For example the listed bundle product shows what products it contains, and subscription products might give more information about the subscription terms.
The Edit Product button allows you to change the product information. With Unlink you can remove the product just from the current resource, and with Delete Product you can delete it completely.
Setting up the Template Variable
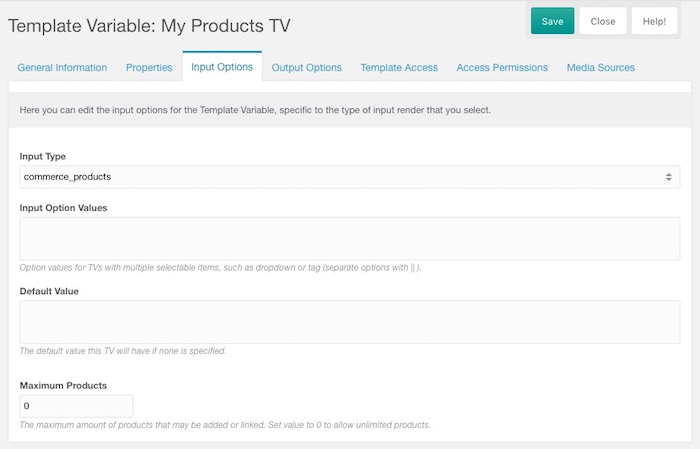
Creating the Products TV is really simple. Just go to Elements > Template Variables in your MODX installation and create a new TV.
Give it a name of products, and a caption of Products or something similar. If you use a different name, make sure to also change the add to cart form (see below) accordingly.
On the Input Options tab, set the Input Type to “[Commerce] Product List” (commerce_products).
If desired, you can set the maximum amount of products as well. This allows you to restrict a products TV to just one product for example. When the maximum has been reached, the Add Product and Link Existing Product buttons are hidden from view.
Setting up the Add to Cart Form
Depending on how you want your add to cart form to look, you can use different methods to show the different products assigned to a resource.
All of these methods use the commerce.get_products snippet. Take a look at that snippet for more information on how you could output the product information. There are also a few examples included below.
For generic instructions in adding products to the cart, see Add to Cart Form. That covers the two main ways to draft your forms, as well as some example code to do it with AJAX.
Radio Buttons
To show product options as radio buttons, you can use something like this. Note: This assumes the template variable is named products, change accordingly.
<form method="post" action="[[~[[++commerce.cart_resource]]]]">
    <input type="hidden" name="add_to_cart" value="1">
    <input type="hidden" name="link" value="[[*id]]">

    <fieldset>
    [[!commerce.get_products?
        &products=`[[*products]]`
        &tpl=`product_as_radio`
    ]]
    </fieldset>
    <div class="product-quantity">
        <label for="add-quantity">Quantity</label>
        <input type="number" id="add-quantity" name="quantity" value="1">
    </div>

    <input type="submit" value="Add to Cart">
</form>
With the following in the chunk product_as_radio:
<div class="product-option">
  <label>
    <input type="radio" name="product" value="[[+id]]">
    [[+name]]
    <span class="right">[[+price_formatted]]</span>
  </label>
</div>
To get a result like this:
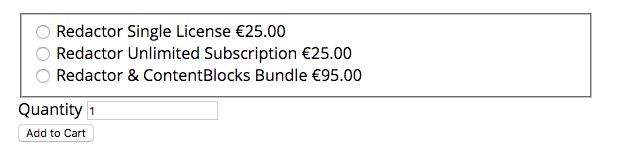
Obviously, you’d use CSS to make it look a lot nicer!
Options as a dropdown
Similarly, to offer options in a dropdown, use something like this:
<form method="post" action="[[~[[++commerce.cart_resource]]]]">
    <input type="hidden" name="add_to_cart" value="1">
    <input type="hidden" name="link" value="[[*id]]">

    <div class="product-variation">
        <label for="choose-variation">Product</label>
        <select id="choose-variation" name="product">
            [[!commerce.get_products?
                &products=`[[*products]]`
                &tpl=`product_as_select`
            ]]
        </select>
    </div>
    <div class="product-quantity">
        <label for="add-quantity">Quantity</label>
        <input type="number" id="add-quantity" name="quantity" value="1">
    </div>

    <input type="submit" value="Add to Cart">
</form>
With the following in chunk product_as_select:
<option value="[[+id]]">[[+name]] ([[+price_formatted]])</option>
Adding Multiple Products to the cart
If you’d like the customer to add all the products to the cart in a single swoop, you can do something like this instead.
<form method="post" action="[[~[[++commerce.cart_resource]]]]">
    <input type="hidden" name="add_to_cart" value="1">
    <input type="hidden" name="link" value="[[*id]]">

    [[!commerce.get_products?
        &products=`[[*products]]`
        &tpl=`product_all_at_once`
    ]]

    <input type="submit" value="Add to Cart">
</form>
With the following in chunk product_all_at_once:
<div class="product-variation">
    <label for="choose-variation">[[+name]], [[+price_formatted]]
 ([[+stock]] in stock)</label>
    <input type="number" name="products[ [[+id]] ][quantity]" value="0">
</div>
Product links and other custom fields
The examples above include a hidden link input that submits the resource ID along with the add-to-cart request. This is meant to be used with the Item Data Module (introduced in 0.11) with link as an allowed field.
It’s recommended to include this in your add to cart form when using the products tv, so that your customer can return to the product resource they added the product from. Contrary to resource products, products in a Product TV don’t natively know what resource they are used on, so lack that link.
To add additional custom data, view the Item Data Module documentation.
Tip: use Form Customization to move the TV
You can move the Products TV to the main “Document” tab of a resource using form customization. To do this, go to System (cog icon in the top right) > Manager Customization.
Create a profile, and a set within the profile if you don’t already have one.
When editing the form customization set, open the Template Variables tab and find your products TV in the list. Double click the value in the “Region” column, and set it to modx-resource-main-left.
Now, open your resource that has the template variable, and voila!
(Note: you may see some excess spacing on the left of the TV. This has been fixed in MODX 2.6.)