ContentBlocks ContentBlocks 1.x Default Templates
Defaults, or more verbosely Default Templates, is a feature introduced in ContentBlocks 1.2. It enables you to configure a standard set of Layouts and Fields (combined into a Template) to use when creating a new resource, or editing a resource that was created before you started using ContentBlocks.
If you haven’t worked with Templates before, be sure to read more about Templates first.
To manage your default templates, go to Extras (or Components pre-2.3) in the top navigation and choose ContentBlocks in the drop down. Open the Defaults tab.
Table of Contents
Rules
Setting up defaults is done using Rules. A Rule basically combines three things:
- Constraint, such as “when the parent is 5”,
- Template, the ContentBlocks kind, which is a set of Layouts and Fields and will be inserted when the constraint is met, and
- Target, which defines where in the template any pre-existing content is placed
When you create a new resource, or edit a resource created prior to installing ContentBlocks, the system will parse your rules from top to bottom until it finds a rule that matches the resource. This means you can do some fairly complex logic by ordering the rules in a certain way. Grouping rules with “AND” or “OR” conditions is not currently supported.
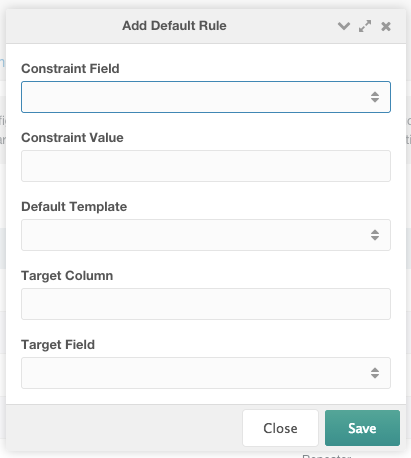
To start creating a Rule, simply click Add Default Rule on the Defaults tab. You’ll see a modal pop up with a few fields.
Let’s go over the different fields to explain what they do, and what to fill in (or choose).
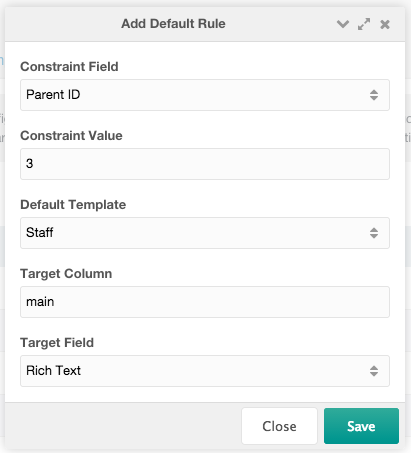
- Constraint Field • This is where you choose what the constraint applies to. The available options include the resource ID, resource type, chosen template, parent, ultimate parent and context. Simply pick the field you want to use as condition.
-
Constraint Value • This is where you can fill in a comma separated list of acceptable values. This typically accepts the IDs of the chosen field, so if you want the rule to kick in when the template is one of 1, 3 or 5; you would fill in
1,3,5as the constraint value. - Default Template • Here you can choose one of your ContentBlocks Templates that will be inserted by default when this rule validates.
- Target Column • Optional, but when you specify the key of a column (the column that is part of the layout you inserted into the template) it will restrict inserting existing content to that column. This is useful if your template contains a multi-column layout, and you want to insert existing content into a specific column instead of the first match.
- Target Field • Choose the Field you want existing content to be placed in. Make sure it exists in your template.
Hit Save, and simply repeat the process to add more rules for specific conditions on your site.
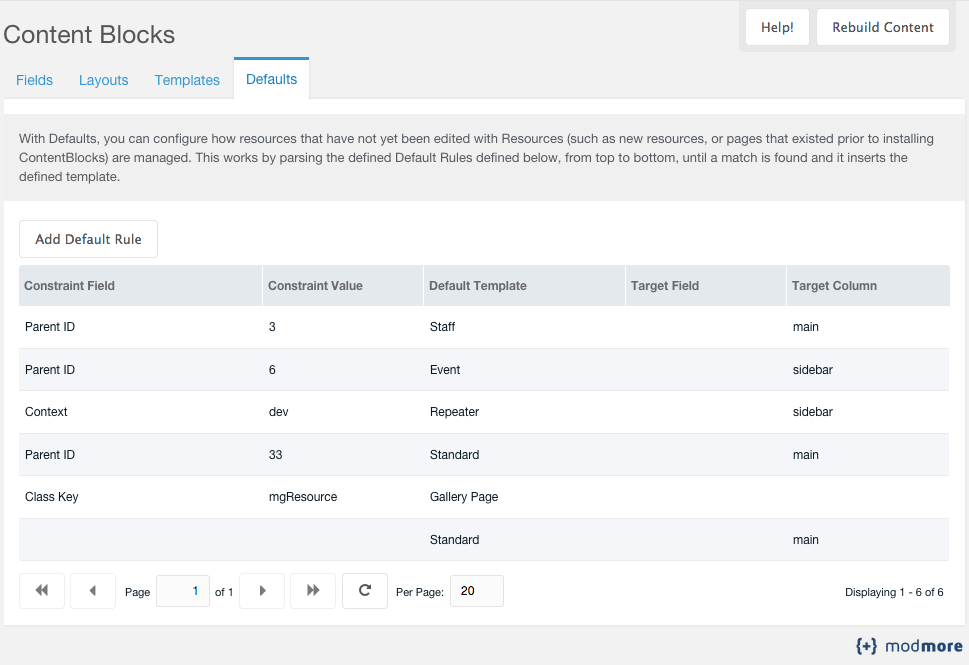
When you have a bunch of rules, you can drag and drop them to reorder them. Keep in mind it is parsed top down, and it stops evaluating rules when it finds a rule is true.
No matching Rules?
When no rules match, which may also occur if you didn’t know about the Default Templates feature until just now, it will insert your default layout with a simple rich text field. This is the same behaviour as before ContentBlocks 1.2 for backwards compatibility reasons, however we have added the ability to specify a field to insert in 1.2.
To change the backup/standard layout, go to Systems (that’s the cog icon in the top right in 2.3+) and System Settings. Find the contentblocks.default_layout setting, and change it to the ID of the layout you want to use. Also use the contentblocks.default_layout_part setting to change the column the rich text field will be inserted to. It will also insert a field, which by default is a text area or rich text field, but you can also set the contentblocks.default_field setting to a different field.