Commerce Commerce 1.x Getting Started Customising the Cart & Checkout
This document assumes Commerce was downloaded and installed with the default options, that you’ve gone through the basic configuration, and started building your Product Catalog to the point of having a functional add-to-cart form.
At this point you should have added your first product to the cart. Congrats!
Now we’re going to start changing the cart and checkout to fit your shop. There’s a lot you can do, some which will require more technical skills than others, so we’ll go over a few common things to do.
It’s important to note that, technically speaking, the cart and checkout are part of the same system. That’s why you’ll also see cart shown as a step in the checkout.
Table of Contents
Exploring the Checkout Steps
By default, Commerce shows all of the following steps:
- Cart, usually on a separate page, where the customer manages the items they’re buying, can add coupon codes, and chooses to checkout
- Account, offers the customer to either login or to continue as a guest
- Address, asks the customer to enter their shipping and billing address information.
- Shipping, asks the customer to choose a shipping method
- Payment, requests payment from the customer
- Thank you, confirms the order was paid and the order is complete
It’s not currently supported* to change the order or functionality of these steps drastically, but there are various ways to make this fit your shop. We’ll go over those options for each step.
* Technically, it is possible to change the checkout steps, but we strongly discourage that level of customisation and do not currently provide documentation or support for it. We may change the underlying system in the future which would break custom checkout processes.
Cart step
The cart step is always present. It’s how you can add items to an order, and where the customer can make changes. With the Coupons module enabled, this also has the form to validate a coupon code.
The cart is usually on its own resource (identified by the commerce.cart_resource system setting), which the Commerce installation will have created for you. You can change the MODX template and presentation of this page to your liking.
Further customisation to the cart usually revolves around changing the design or templates; we’ll get to how that works in a minute.
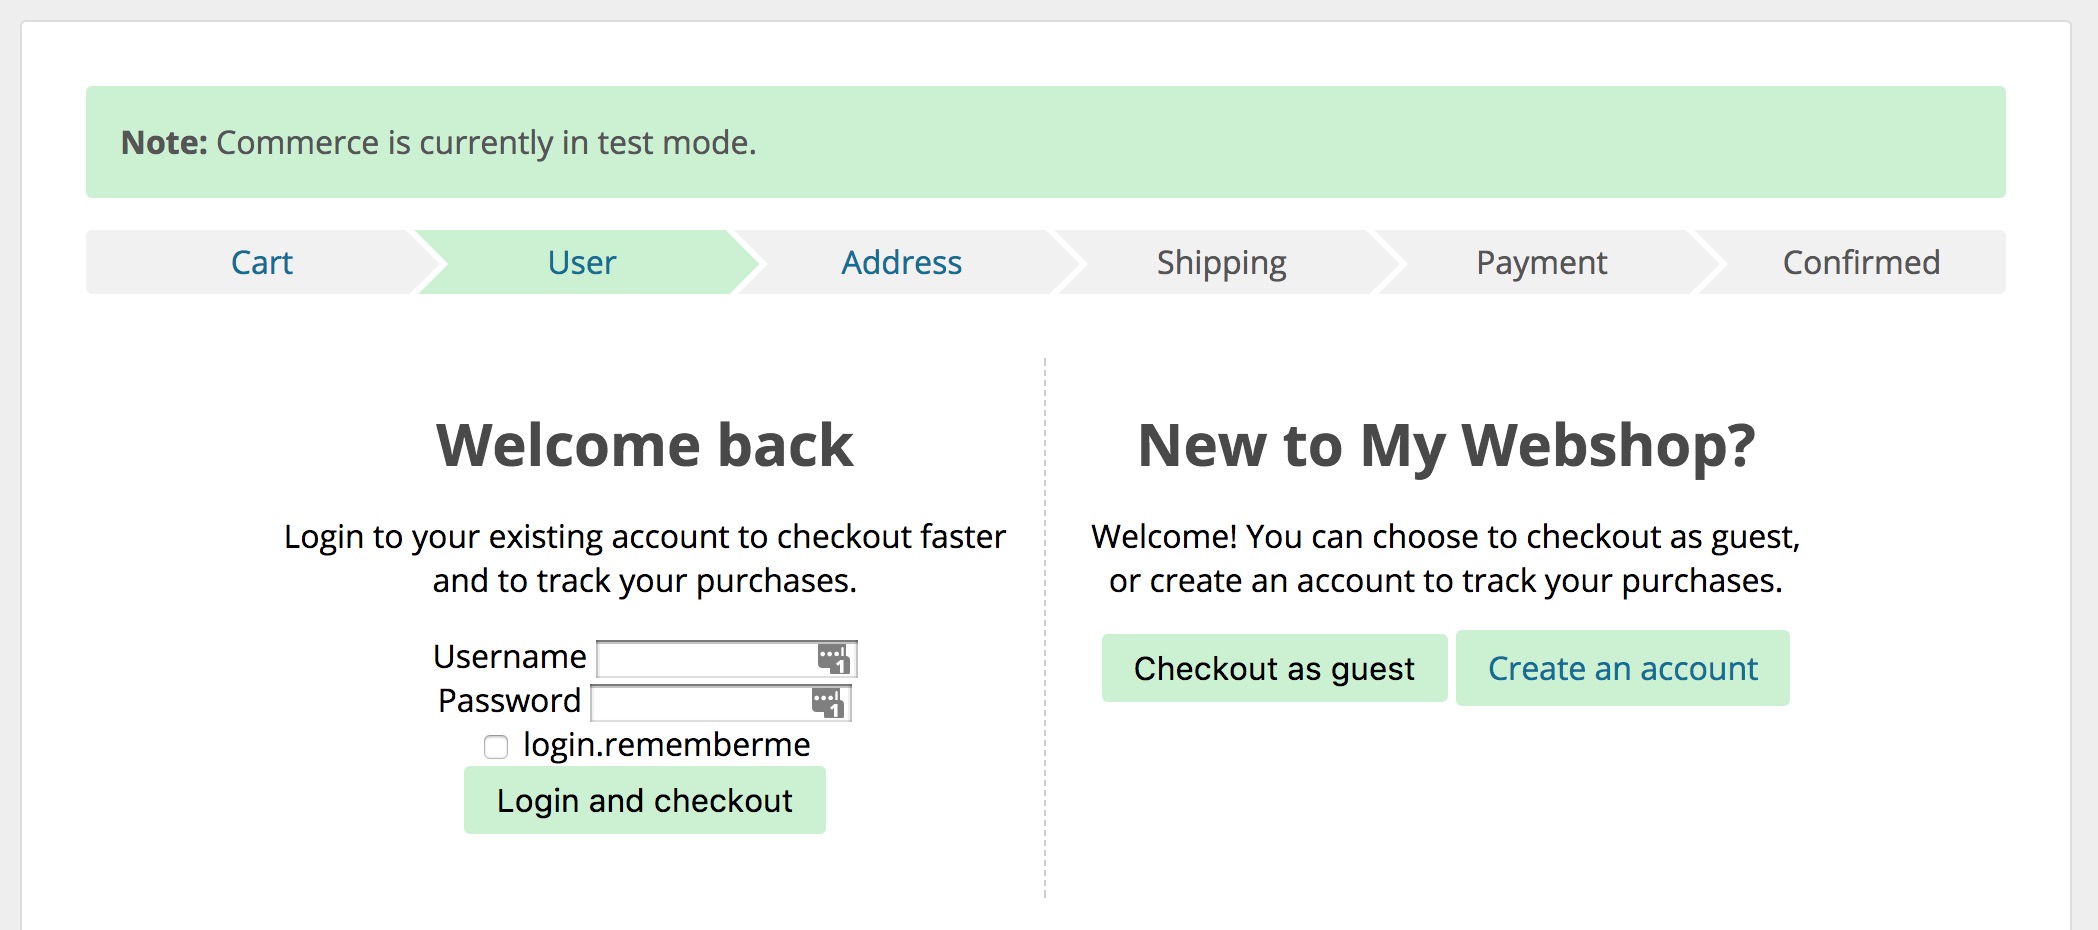
Account step
The account step is optional, shown by default.
If the customer visiting this step is already logged in, the customer will be immediately redirected to the next step.
If the customer is not logged in, there are 2 options shown. There’s a simple login form (which you’ll need to set up to work with the Login snippet as that’s not done automatically for you) and a link to a registration page, and a button that lets the customer continue as a guest, without an account.
Other use cases for the account step are possible just by changing a few system settings:
-
To always require a user to be logged in, set the
commerce.checkout_requires_accountsystem setting to yes. This will replace the block to continue as guest with a notice that an account is required. -
To skip the account step completely, set both the
commerce.checkout_requires_accountandcommerce.checkout_show_account_stepsettings tono. The account step will be removed from checkout completely.
Address step
The address step is required. It’s where the customer enters their shipping (and optionally billing) address. If the customer is logged in, the address step may show previously used addresses as an option to speed along the process.
Shipping step
The shipping step is optional. When shown, it will calculate how much it costs to ship with each of your configured shipping methods, show them in a list, and ask the customer to choose. If there are products from multiple delivery types in the order, the customer will be asked to choose a shipping method for each.
Commerce automatically selects the first available shipping method as soon as the cart, to present the user with an accurate total as soon as possible.
On each delivery type you can choose what to do with the shipping step:
- By default, the shipping step is set to “depends”, which means it will only be shown if there is more than one matching shipping method for the order.
- When you set the shipping step to “required” on the delivery type, the shipping step is always shown, even with just one matching shipping method that has been pre-selected.
- When you set the shipping step to “never”, it is always hidden, and the customer cannot change the shipping method from the pre-selected one.
Payment step
The payment step is required. It lists available payment methods, including the calculated fee if set.
If the order total is zero because of a coupon, or all products being free, then the payment step is automatically skipped and the order marked as completed.
If the total is not zero, but you do not intend to use online payments, you can create a payment method with the Manual payment gateway. That will mark the order as paid without the customer actually paying.
If you’d like to implement a sort of “confirmation step” into the checkout, it’s recommended to change the templating of the payment step to act as that instead. If you want to have a checkbox that requires customers to accept terms and conditions, enable the Accept Terms module.
Thank you step
When the customer visits the thank you page, the order is completed and their cart is emptied for future orders.
Design & templates
You have full control over the design and templating of your site. This is still MODX, after all!
For your catalog you’ll mostly use your standard MODX templating. For the cart and the checkout, however, you’ll use Twig templates, which are stored in files.
The default templates can be found in core/components/commerce/templates/default/ - these will be overwritten on upgrade, so don’t edit them directly.
Start by changing the commerce.theme system setting. Give it a name, for example myshop, and create a new directory under core/components/commerce/templates/ with the same name. That’s now your own theme directory, which is safe from upgrades.
To change templates, you will now copy them from the default folder, and paste them into the same directory structure in your myshop directory.
Hello world
Let’s try it by adding “Hello world” to our cart.
Copy core/components/commerce/templates/default/frontend/checkout/cart.twig into your theme directory following the same structure, so place the copy in core/components/commerce/templates/myshop/frontend/checkout/cart.twig.
(If you want to do this via the manager, change the upload_files system setting to include the twig extension.)
The template looks something like this:
<div class="c-checkout c-cart c-checkout-cart">
    <h2>
        {% if order.total_quantity != 1 %}
            {{ lex('commerce.cart_header', { 'items': order.total_quantity }) }}
        {% else %}
            {{ lex('commerce.cart_header_single') }}
        {% endif %}
    </h2>

    {% include 'frontend/response-messages.twig' %}

    {% if items|length > 0 %}
        {% include 'frontend/checkout/cart/items.twig' %}
        <div class="c-cart-actions">
            <div class="c-cart-optional">
                {% include 'frontend/checkout/cart/aside.twig' %}
            </div>
            <div class="c-cart-totals-wrapper">
                {% include 'frontend/checkout/cart/totals.twig' %}

                <form method="POST" action="{{ current_url }}" class="c-submit">
                    <input type="hidden" name="checkout" value="1">
                    <button class="c-button c-primary-button" type="submit">{{ lex('commerce.checkout') }}</button>
                </form>
            </div>
        </div>
    {% else %}
        <p><a href="{{ shop_root_url }}">{{ lex('commerce.cart.no_items_yet') }} {{ lex('commerce.cart.continue_shopping') }}</a></p>
    {% endif %}
</div>
Change the heading bit at the top to the following:
    <h2>
        Hi there!
        {% if order.total_quantity != 1 %}
            {{ lex('commerce.cart_header', { 'items': order.total_quantity }) }}
        {% else %}
            {{ lex('commerce.cart_header_single') }}
        {% endif %}
    </h2>
If you visit your cart now, that should say Hi there! towards the top.
More tweaking
There’s a few dozen templates you can tweak in the same way. Their naming are hopefully clear enough to indicate where they are used, and you may also come across include calls in some templates referencing other nested templates.
You only have to copy the templates you want to change - all other templates will fall back to the default template.
In general, all templates in the frontend and emails directories are safe to change. Make sure to keep IDs and input names the same, to ensure things keep working as expected. Class names are less critical, but in some cases (payment method templates especially), you may want to keep those as-is.
Note: It’s recommended to not edit any of the admin templates, those are used in the dashboard and we do not currently make an effort to preserve backwards compatibility in those templates. This means that if you copy or change the admin templates, and upgrade Commerce, you may end up with a broken dashboard.
CSS, lexicons, custom theme folders, and more
See theming for more options to change the design and templates. There are many different things you can do.
Next
When you have your shop functional, it’s time to talk about the next steps.